AWS Full CICD 1 – 创建CodeCommit Project
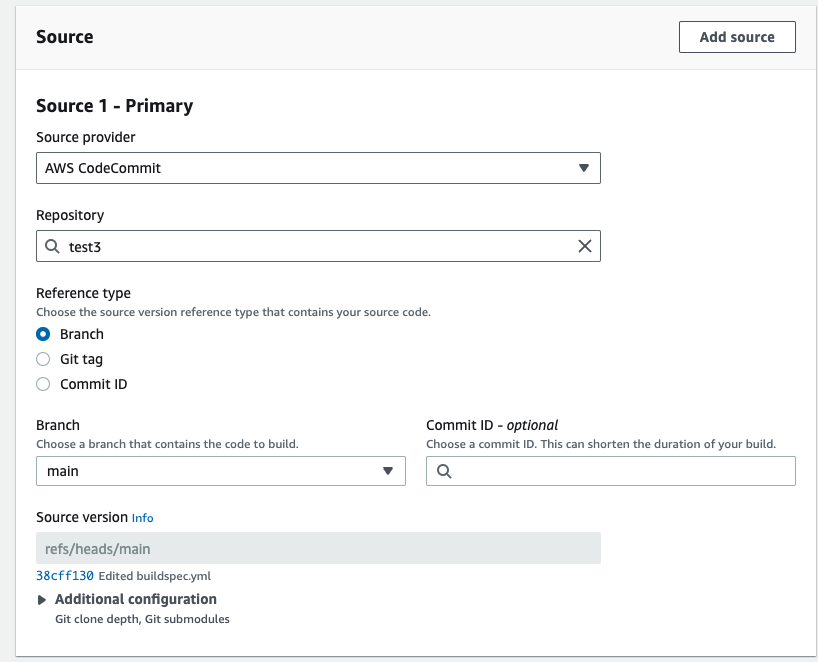
- 需要在Source区填写你这个project需要从哪个CodeCommit repo的branch中拉去代码
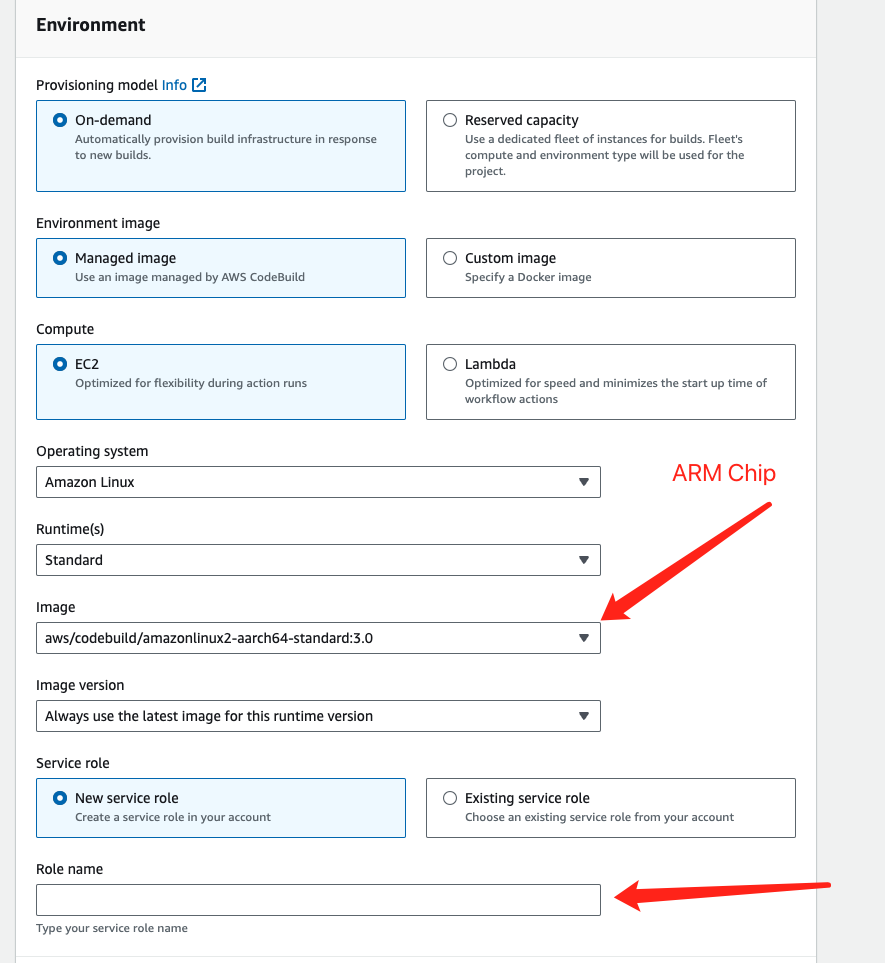
2. 在Environment区当中
– Image选择aarch64就是选择ARM处理器
– Service Role 如果没有创建过需要创建一下,名字我们放比较通用的就是 CodeBuildRole
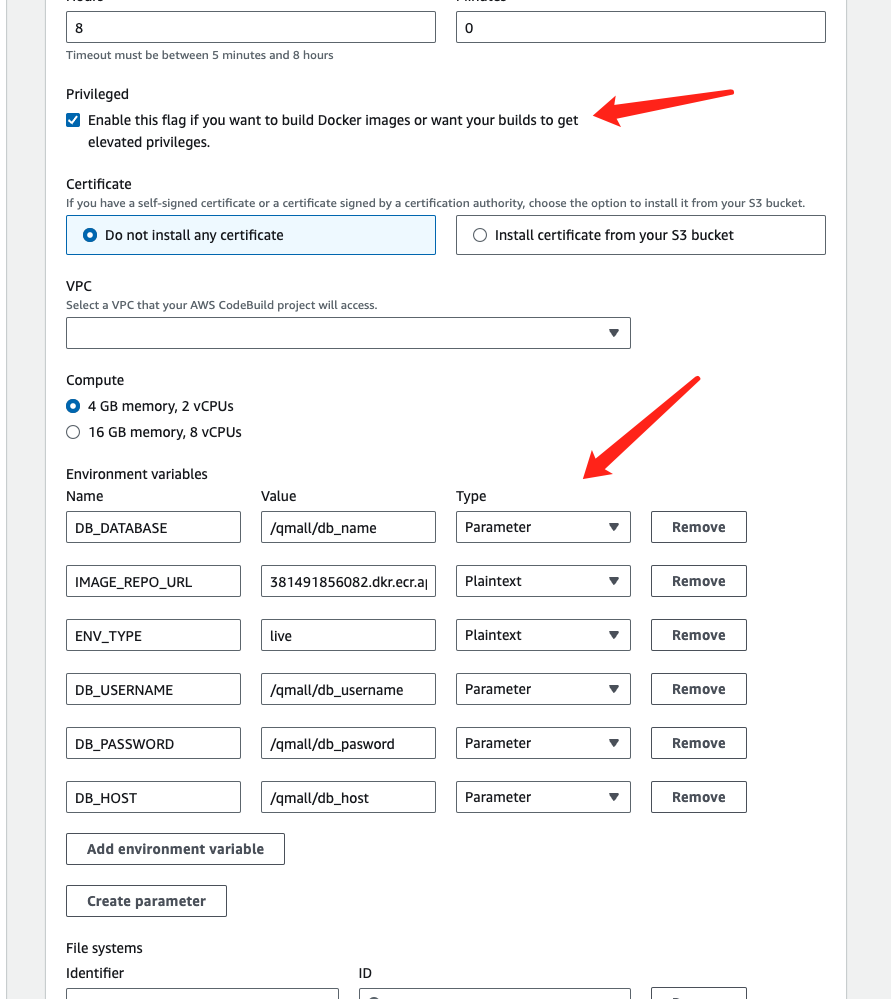
3. 接下来还需要在environment区,设定Environment Variables
– Plaintext的种类是如果没有什么安全信息的话可以选择输入你的值
– Parameter就是从ParameterStore当中获取值,这是比较安全的做法,而且也不会出现在build log内
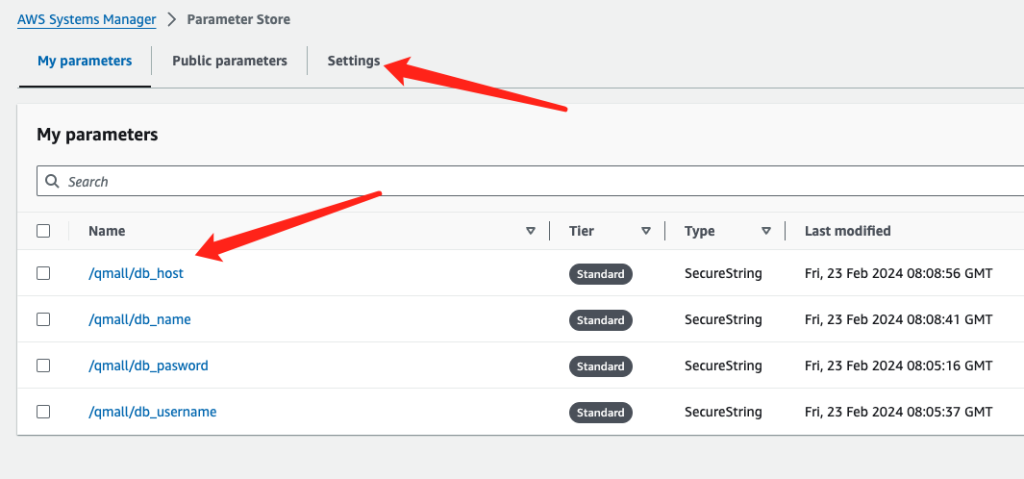
– 选择Parameter的话需要在value当中输入Parameter Name, 有使用Parameter的话需要预先在ParameterStore创建Parameter
创建Parameter参考文章:https://www.pangzai.win/aws-parameterstore%e5%bd%93%e4%b8%ad%e5%88%9b%e5%bb%baparameter/
– 构建 docker image的话必须在privileged打钩 Enable this flag if you want to build Docker images or want your builds to get elevated privileges.
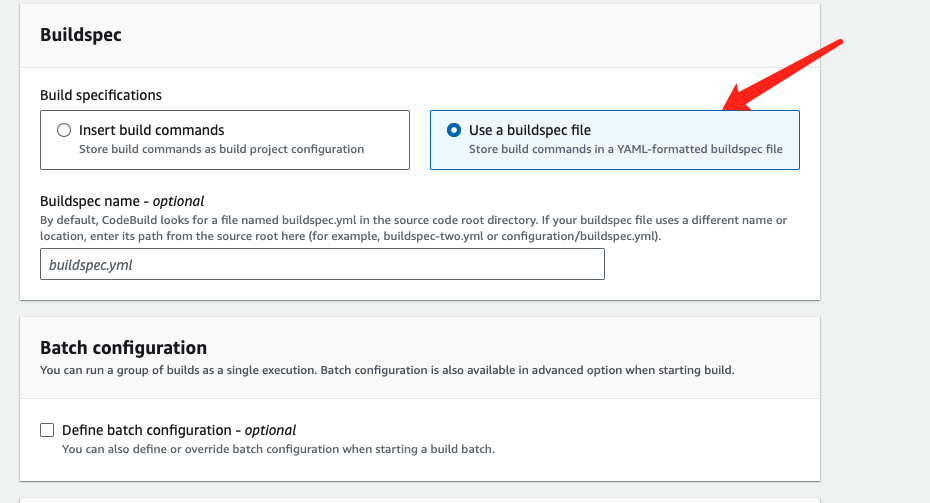
4. 需要选择use a buildspec file,如果你有自定义的buildspec文件名字,可以输入自己的版本
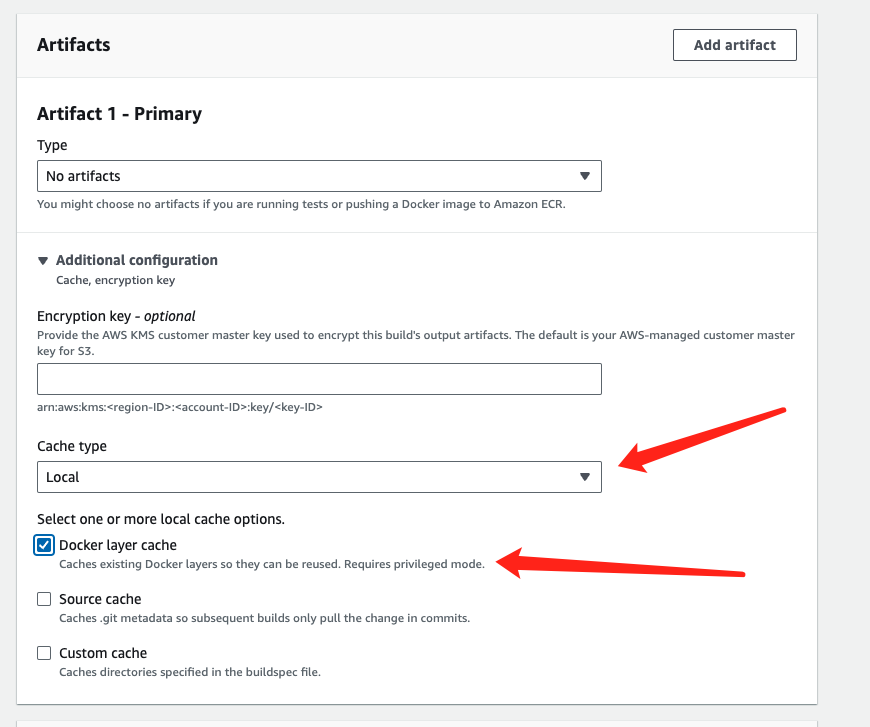
5. 在artifact当中cache type 需要选择local,然后选择docker layer cache,加速build speed
AWS Full CICD 1 – 创建CodeCommit Project
AWS Full CICD 2 – 为CodeBuild Service Role添加权限
AWS Full CICD 3 – 准备好buildspec.yml
![]()